https://medium.com/twenty-years-in-the-valley/one-of-the-biggest-mistakes-i-ve-made-in-my-career-72bf27c538b4
Here’s a good take on that question.
https://medium.com/twenty-years-in-the-valley/one-of-the-biggest-mistakes-i-ve-made-in-my-career-72bf27c538b4
Here’s a good take on that question.
Here are a few examples showing a scrolling page. These examples are built with absolute and relative positioned elements. Motion is handled with jQuery, using the scrollTop, and scrollLeft properties.
The following series of Codepen examples try to explain the use of absolute and relative position. Visit each of these, read the code, make changes in codepen, and see what happens. Next try and recreate these for yourself.
If you haven’t heard Swift is a new language from Apple. Swift aims to be a modern language that streamlines your work.
Swift is strongly typed. This means that every value in Swift must be assigned a type.
Here I would like to talk about one feature in Swift called Structs. Struct is short for Structure or Construct. A Struct is similar to an Object in JavaScript.
In Swift a Struct is value. You can think of it as a complex value. If you were to think of a typical value, in a variable you might think:
var x = 230Here you have a single name, x, representing a single value the number (Int) 230. A Struct is the same, with the difference that a Struct is a structure containing more than a single value. You can think of the difference conceptually as the difference between: nail, and house. Nail is a single discrete element, while a house is single structure, it contains many sub elements.
var nail = 1
struct House {
    var nails = 23000
    var boards = 1200
}
You can see the variable nail holds a single value, while the house has two values: nails, and boards, and could contain any number of other values, like doors, switches outlets etc. Think of a Struct as a way to define an element that contains a group of related values. Imagine everything in your house as a struct:
struct House {
    var nails = 1000
    var boards = 200
    var lightSwitches = 4
    var doors = 3
    var sink = 1
    var toilet = 1
}

var myHouse = House()
println(myHouse.boards)
Structs can also contain functions. In many ways a Struct is similar to a class. From our perspective they act in very much the same ways. Internally the software works them. Structs are assigned as values and Objects created from a Class are assigned as reference.
Copy vs Reference
When assigning a value (this would be how Structs are passed around) the computer creates a copy of the Struct. When you assign an Object you are assigning a reference to the original Object. In short:
Structs are always copied when they are assigned.
Class Objects are not copied when they assigned.
For example:
struct House {
    var address = "123 Maple St."
}

var a = House()
var b = a
b.address = "321 Elm St."

println(a.address) // prints 123 Maple St.
println(b.address) // prints 321 Elm St.
Here you have two separate Houses. The first (a) would have the address 123, the second would have the address 321.
Here’s what would happen with a Class
class House {
    var address = "123 Maple St"
}

var a = House()
var b = a
b.address = "321 Elm St."

println(a.address) // prints 321 Elm St.
println(b.address) // prints 321 Elm St.
You have two references to the same house, which moved from it’s original address to the 321 address.
Here is what Apple has to say about structs: https://developer.apple.com/library/ios/documentation/Swift/Conceptual/Swift_Programming_Language/ClassesAndStructures.html
In Swift everything has a type. And these types can be fairly detailed. For example, Swift makes a clear distinction between a single Character, and a Collection of Characters.
A Character in Swift can be any Character, this includes Emoji characters, and any other special character from any language set. You aren’t limited to UTF-8 characters.
Like many other programming languages Swift allows an escape sequence to represent special characters like these:
Characters also have a Name which describes the Character. For example a might be LATIN-SMALL LETTER A, while an Emoji might be FRONT-FACING BABY CHICK.
A String is a collection of Characters. The String has methods that allow us to access each Character in the String, and modify those Characters.
The String Class has so many options I couldn’t list them all here. All of the standard features you would expect exist. Though they might some different names. Things like:
Often when programming you keep track of fixed sets of things. These could be choices like how you will view something, for example Year, Month, Week, or Day. Other sets might be related to the capabilities of your app like the orientation: Portrait, Landscape. Or it could be a list enemy or character types a game might create. Another example might be the colors of tags that an app might use to organize elements.
When creating these things you look for ways to organize them. Often they end up in lists or arrays. While this works well there are some limits and awkward situations that arise. For example if you created a list of colors:
tagColors = [Red, Orange, Yellow, Green, Blue]
You would need to access these colors via their index. Which is awkward. For example:
tagColors[0] // Red
There is also a problem in that your tag colors might be fixed, the Array provides many methods that allow the list to be modified. While you can work around many of these things, there is also ready made construct for this purpose the Enum.
Enum or Enumeration is similar to a Struct though more limited. Enums provide a system for creating variables that have very specifically defined values. Use an enum when you want to ensure that a predefined set of values are used.
For example, imagine your program wants to set the colors of some tags. The colors are predefined as: Red, Orange, Yellow Green, Blue, and Purple, an Enum provides a perfect way to keep these organized, while also making your code more organized and easier to work with.
Names like Red, and Green work well in code. Writing the actual color in code is difficult to work with.
Just looking at this it’s really hard to tell Yellow: #e7d936 from Green: #39b54a.
Working with these colors in Xcode there is the added problem that you will most often want a UIColor() which requires more than knowing the hex value. So the colors above might actually look like this in code:
To make make a UIColor out of Red we need to write something like:
UIColor(red: 179, green: 47, blue: 60, alpha: 1)
That’s a lot to write. If it were used more than once in our program, and it probably will be, there will be a lot of code for us to write, which translates into more chances for errors, and difficulty in making changes.
You might also want the Hex value: #b32f3c, at another point, and the color name: Red at another time. You might want to display a table cell, set the background to the color, with UIColor(), you may also want to display the tag name: Red on the right side. Both of these items are tied together and related. To work with them in code we want the same type of relationship. We want to talk about Red, and have that mean the UIColor(), and the name, and anything else associated with Red. An Enum is a programming structure in Swift that is made for exactly this.
enum TagColor {
    case Red, Orange, Yellow, Green, Blue, Purple
}
This is an Enum named: TagColor, it defines 6 named values. You can put each on it’s own line also:
enum TagColor {
    case Red
    case Orange
    case Yellow
    case Green
    case Blue
    case Purple
}
Any variable can now hold a reference to one of the colors.
var myColor = TagColor.RedYou can Type something as TagColor
var aColor: TagColorNow you have to assign this item a TagColor.
aColor = TagColor.BlueIf something is typed to an Enum you can shorten the value to a dot and the name:
aColor = .BlueAn Enum can contain methods. Using a method your Enum can return a UIColor object for each color. Use a switch statement that returns a UIColor for each of the enum keywords we defined. This switch statement must provide a case for all of the key words. For example add function called toUIColor, that returns a UIColor:
func toUIColor() -> UIColor {
switch self {
    case .Red:
        return UIColor(red: 179, green: 47, blue: 60, alpha: 1)

    case .Orange:
        return UIColor(red: 248, green: 148, blue: 29, alpha: 1)

    case .Yellow:
        return UIColor(red: 231, green: 217, blue: 54, alpha: 1)

    case .Green:
        return UIColor(red: 57, green: 181, blue: 74, alpha: 1)

    case .Blue:
        return UIColor(red: 0, green: 114, blue: 188, alpha: 1)

    case .Purple:
        return UIColor(red: 146, green: 39, blue: 143, alpha: 1)

    }

}
Call a method in an Enum like this:
TagColor.Blue.toUIColor()or
var aColor = TagColor.Orange.toString() // Returns String UIColorHere are all of the things above in a playground.
import UIKit

enum Suit {
    case Spades, Hearts, Diamonds, Clubs
}

enum Colors {
    case Red, Yellow, Green, Cyan, Blue, Magenta

    func toHex() -> String {
        switch self {
        case .Red:
            return "#FF0000"
        case .Yellow:
            return "#FFFF00"
        case Green:
            return "#00FF00"
        case .Cyan:
            return "#00FFFF"
        case .Blue:
            return "#0000FF"
        case .Magenta:
            return "#FF00FF"
        }
    }
}

var red = Colors.Red.toHex()
println("Color:\(Colors.Red.toHex())")

enum TagColor {
    case Red, Orange, Yellow, Green, Blue, Purple

    func toUIColor() -> UIColor {
        switch self {
        case .Red:
            return UIColor(red: 179, green: 47, blue: 60, alpha: 1)
        case .Orange:
            return UIColor(red: 248, green: 148, blue: 29, alpha: 1)
        case .Yellow:
            return UIColor(red: 231, green: 217, blue: 54, alpha: 1)
        case .Green:
            return UIColor(red: 57, green: 181, blue: 74, alpha: 1)
        case .Blue:
            return UIColor(red: 0, green: 114, blue: 188, alpha: 1)
        case .Purple:
            return UIColor(red: 146, green: 39, blue: 143, alpha: 1)
        }
    }

    func toHex() -> String {
        switch self {
        case .Red:
            return "#b32f3c"
        case .Orange:
            return "#f8941d"
        case .Yellow:
            return "#e7d936"
        case .Green:
            return "#39b54a"
        case .Blue:
            return "#0072bc"
        case .Purple:
            return "#92278f"
        }
    }

    func toString() -> String {
        switch self {
        case .Red:
            return "Red"
        case .Orange:
            return "Orange"
        case .Yellow:
            return "Yellow"
        case .Green:
            return "Green"
        case .Blue:
            return "Blue"
        case .Purple:
            return "Purple"
        }
    }
}

var myTag = TagColor.Red
var yourTag = TagColor.Green
var aColor: TagColor

aColor = .Blue

TagColor.Blue.toString()

println(myTag.toHex())
println(myTag.toUIColor())
println(myTag.toString())

// A function that takes an enum value
func makeTag(color: TagColor) {
    println("makes a tag of color:\(color.toString())")
}

makeTag(TagColor.Purple)

// If the type is an enum you can shorten to a dot and the keyword name
makeTag(.Green) Parse.com is a service that wants to provides a backend for your social media apps. It’s my opinion that Parse is the easiest and fastest way for designers to get into creating social media apps and web sites.
The standard method to create a social media app or web site is to create a database and access the database using code written in MySQL. You also need code written in PHP to facilitate transactions with MySQL and manage content from the database. Together this is called the backend. All of these processes happen on a remote computer, your web host.
To have something people can look at you use HTML, CSS, and Javascript. This is called the frontend. You use HTML to structure your web pages, CSS to style them, and javascript to add functionality.
Let’s sum that up. To make a web site that has social media features you need (from front to back):
Parse.com provides a service that removes the need for backend programming from the equation. With Parse all of the backend code is handled by the front end. Parse calls itself a: BaaS, which stands for Backend as a Service. The Parse service provides a ready made and hosted backend that can be used to build just about any type of social media app or web site.
Parse saves time by not requiring that you write backend code for creating and configure databases and tables. Parse provides ready made systems for managing user accounts and login. Creating a user login with Parse is as simple as creating the login or sign up form in HTML, CSS, and adding a few lines JavaScript.
For the record, I do not works for Parse and receive nothing from them. As an educator I see Parse as being the easiest way for students to make their social ideas into truly functional apps. For anyone else trying to make their social media ideas into real functioning work, Parse removes many of the roadblocks.
Anyone wanting to get started making a social media network would benefit. Parse is well suited to small groups or individuals who want to get started making a social media site. If your skills are more frontend oriented, HTML, CSS, JS, then Parse will save you the trouble of learning PHP, MySQL.
Parse is targeted at startups and small teams looking to create new social media platforms quickly and easily. I see it as a perfect fit for students, as the focus of our students is on front end design and programming. Building an app with Parse moves all of the work of creating a social media app into the front end, and concentrates programming tasks into a smaller set of more familiar tools: HTML, CSS, and JS.
In short the Parse service works with Javascript. Essentially you create objects you wish to save in Javascript, and the Parse server takes care of the rest. To display data from the server you request objects from the Parse server through Javascript. Obviously there is a more to it than those two sentences, but not much more.
What kind of things can you make with Parse?
Any social media web site or App. Parse provides libraries code for Xcode, and Android. You can make mobile Application with much less effort, and I’ll say it again, without having to create a backend service, and database. Check out this page of customers using Parse:
Hello Kitty is using Parse!
I really like the look of Famo.us, I just haven’t had the time to play with it much. I had some time today, and thought I should wait no longer! Having already done the tutorials on the Famo.us University pages, I thought I’d try and tackle some more practical problems.
When making mobile applications, the scrollview is ubiquitous. This is a UI widget that shows up everywhere and has so many uses. Luckily Famo.us has a an example in their Starter Kit. Download it from their home page.
The scrollview example is located in reference-examples/views/scrollview.
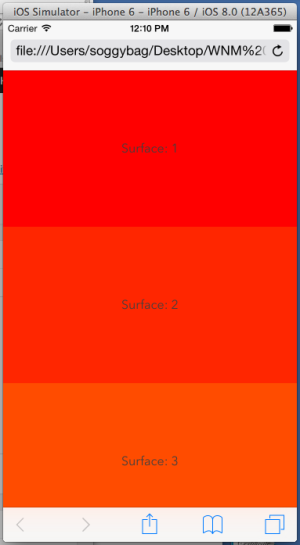
Take a look at the example itself. The code looks pretty simple, if you’ve gone through the University Tutorials, you should recognize many of the features. Open the example in a browser and test it. Just a set of colored rows with a single line of text. The scrollview doesn’t scroll with a click and drag. It does scroll with a swipe on the track pad. This doesn’t look like it’s doing anything, or is it? Try it in the iOS simulator, or on your mobile device. Here it scrolls with a swipe as expected.
Take a look at the files in the example folder. There are really two files:
Looking at index.html you will see that there is not a whole lot there. There are a few links to js files, that are commented as “Shims for backwards compatibility.” I’ll guess these are not necessary for modern browsers. Then there is a section commented as “famous.” I’ll take a guess that this is the main famous stuff. This section has two style sheets and two js scripts. The first script loads famous from the famous CDN. While the second script loads “src/main.js”, which is the example js.
Take a look at main.js. Overall this is pretty short. The code is wrapped in a define() block. The function passed to define must be called when the rest of the famous and the DOM is loaded. Here require() is used to load modules of the famous code base.
After the requires, a context is created, mainContext. The context is the container that renders surfaces.
Next is a new Scrollview object is created.
Then a an empty array, surfaces, is defined. The array is passed to the scrollview object via sequenceFrom().
A note on scrollviews. In general these are set up to display items from a list, or array. The scrollview only displays the rows that are currently visible. If you have a list containing thousands of items, I imagine your iTunes library has thousands of items, your mobile computer does not have enough memory to display all of these as one giant list. Instead the the computer displays only the rows that are currently visible on the screen. I’m guessing Famous is using the same strategy. Hence it needs a list of surfaces to display. The scrollview will mange displaying these surfaces.
Next there is a for loop that builds surfaces and adds them to the surfaces array. Each surface is created with newSurface(). The content of a surface will be the text: “Surface: #”, where # is the number of the surface. The width is undefined, I’ll guess this allows the surface to be any width, and the height is 200 px. Next the surface is assigned properties. The background color, line height, and text align. These are standard CSS properties.
Each new surface was created in a local variable named temp. Next we’re calling the pipe() method and passing a reference to the scrollview. I’m not sure what this doing, I’ll have to revisit the Famous University.
Next push each new surface into the surfaces array.
Last, add the scrollview to the mainContext with add().
The best way to understand how these things work, and to develop ideas as to how you can use them for your own projects is to experiment! The best way to test these things is to start small. Making small changes and testing to observe the results.
As a start lets work with the content. Line 52 shows:
content: "Surface: " + (i + 1),
This seems to be the content of each row in the scrollview. Let’s play with this and test that assumption. Change the content, try making these changes:
Next change the size of the rows. As is each row 200 px tall, note that the content has a line height 200 px which places the text in the vertical center, and also makes the text take up the whole height of the row.
Change the line height to something more smaller. Add a second line of content to each row.
Try out these properties:
The tableview is not very useful if you can’t customize the content of each row. In the example, rows are generated within a loop, and the only real content is the row number.
Make an array to mock up some more relevant content. The demo uses a loop:
for (var i = 0, temp; i < 40; i++) {
    ...
}
Try replacing this with an array. Define an array and then loop through the array:
var array = ["A", "B", "C", "D"]; // add a lot more, do the whole alphabet
for (var i = 0; i < array.length; i++) {
    ...
}
With this you should see the same rows, but only as many rows as you have elements in the array. Now display the content from the array. Find where the content property is set for the surface. Try this:
...
content: "Surface: " + array[i] + " " + (i + 1),
...
At this point you should see something like: “Surface: A 0” for each row. You can use HTML and CSS in here also. Imagine this:
...
content: "<strong>Surface: " + array[i] + "</strong> " + (i + 1),
...
Add a class name. You’ll need to style this class in your style sheet.
...
content: "<strong><span class='title'>Surface:</span> <span class='content'>" + array[i] + "</span></strong> <span class='count'>" + (i + 1) + "</span>",
...
Watch the quotes carefully. Attribute values must always be in quotes. Since the outer quote is a double “, the inner quotes need to be single ‘.
Adjust the height of the cell.
...
size: [undefined, 100], // Change the height to 100
...
The example adds a few properties like:
 properties: {
     backgroundColor: "hsl(" + (i * 360 / 40) + ", 100%, 50%)",
     lineHeight: "200px",
     textAlign: "center"
 }
These these generate CSS properties that are attached to the row element as inline styles. Prove this to yourself. Use the inspector to view one of the scrollview cell rows. You should see something like:
<div class="famous-surface" style="line-height: 200px; text-align: center; opacity: 0.999999; -webkit-transform-origin: 0% 0%; -webkit-transform: matrix3d(1, 0, 0, 0, 0, 1, 0, 0, 0, 0, 1, 0, 0, 200, 0, 1); width: 400px; height: 200px; background-color: rgb(255, 38, 0);">Surface: 2</div>
This shows each row is displayed from a div with a famous class, and some style properties. Some of the properties are applied by famous, while others were added by us when the surface was created.
I think it’s probably better to move our styles to a style sheet. At this point it’s hard to say if this is best practice for Famous. In any regular HTML page it would definitely be best practice.
Note that the color value is generated for each row, the value is based on the row number. It’s this system that gives us the great rainbow effect. For styles that need to be generated on the fly based on data only available when the surface element is created, setting the properties here is a good idea. For general properties, I’m guessing it will better to use a style sheet.
Here are some thoughts on HTML5 and whether it’s up to the task of making mobile apps.
This article from principal HTML5 evangelist at Mozzilla. He says browsers are not up to the task. This is coming from someone at a company that makes browsers. He’s saying the browsers don’t do enough to satisfy the vision that everyone has for HTML5. I have to ask is that a problem of the browser really? Is this a case where someone is saying “hey your browser needs to live up to my vision.”
He also says:
HTML5 is a recognized as a set of standards-based specifications for so-called modern Web applications with multimedia capabilities, leveraging JavaScript and Cascading Style Sheets.
After reading this I had to ask. Is a web browser with multimedia capabilities really the platform to deliver full feature mobile applications?
Here’s another article
Here is a quote:
But adopting HTML5 for mobile apps isn’t a panacea, as reflected in Forrester’s findings. In fact, one of the report’s survey responses noted that 59 percent of the time, apps developed solely using HTML5 took longer to deliver than planned. With non-native responsive frameworks, the greatest amount of time was lost testing and fixing issues.
The survey of developers says 59% of the time HTML5 apps took longer to develop.That flies in the face what people have been touting as common wisdom for the last few years. It seems to fit with my limited personal experience.
Here’s another survey:
This survey from 2012 says an overwhelming percentage of developers are planning to use HTML5 to build their apps. Their top reason: familiarity with the languages HTML/CSS/JS. I have to ask is that the right reasoning? Admittedly the second most popular reason was cross platform compatibility. You can only imagine that wanting building apps in HTML5 since it is more familiar means that these people do not want to spend time learning a native development tool, and they thought it would be faster and easier. In the article above, from 2014, two years later, shows that a majority of developers agree that it took longer to develop their apps in HTML5. I can imagine that a fair amount of apps took just as long it would have taken to develop native. A few may have been developed faster. But for the majority it was longer or about the same, to develop an app that will lower performance than a native app.
Not sure this looks like it may have come from the same survey above, but doesn’t appear in that article:
Again here they show 90% of developers using HTML5. I work with students developing apps, and many students want to use HTML5. Many for the reasons popular in the article above, ease and familiarity. I would say a majority of the projects are social media. Notice the chart here labeled types of apps. The most popular app is productivity at 54%, social media apps is 18%.
You could say that social there are fewer people developing social media, and that may be true, it’s hard to say from this chart. Look at games only 8%. Games have to be in the top three for shear volume in apps. Social media apps are also very popular. Looking at the chart in this light, you might start to think that people are choosing native for games and social media. Obviously you can’t make a definitive conclusion like this from this information, but it does hint that there is more to this than the 90% figure.
Also note that the survey was conducted by Telerik kendo UI who develop an HTML5 mobile framework. Some of the questions skew in the favor HTML5 like:
Targeting multiple platforms with native is native’s biggest disadvantage.
I went out on a limb earlier and said that native apps had better performance. What does that mean?
This survey says people prefer native apps. Here’s a quote:
“Smartphone home screens across the country are littered with the tombstones of mediocre, try-once-and-forget apps,” Joseph Farrell, executive vice president of operations at Bite Interactive, said in a statement. “Brands and developers too often lose sight of the most important aspects of developing mobile applications: build in-brand, powerful and highly usable apps that continually deliver real value to your users by solving the problem they have asked you to solve. Delivering continued, iterative and brilliantly executed solutions to those evolving problems should always be the primary objective.”
I think this is a good point. Developing an app faster (or may be not faster) for less, is this a good thing when the user experience is poor? Did you really save time and money? Was your time and money well spent? Maybe not.
From a user perspective native is better. From a developer perspective HTML5 seems to be preferred. Think about that for a moment. Is this the cart driving the horse? shouldn’t a developer want to produce the app that will provide the best experience and performance for a user? Seems like there is little advantage in choosing to develop an app in HTML5 because you are familiar with it, rather than it is the best tool for the job.
But wait, there’s more. Here’s another.
Here’s an interesting paragraph:
This was the lowest level since Appcelerator began tracking the specification in April 2011. “Interest in HTML5 peaked in July 2012 at 72.7 percent and has shown and uneven but downward slope since,” the report said.
I think this is referring to the same survey that showed HTML5 down to 59%. They mention a downward trend. There isn’t a chart or reference to this, which is too bad. It should be noted, that the survey mentioned here is from Appcelerator, which is a JS based pseudo native app development tool.
Here’s a quote from another source:
In the battle between HTML5 and native apps, HTML5 is starting to become a strong contender. While native app approaches have been a top choice in the past, a recent survey revealed that 57% of participants believe HTML5 is enterprise-ready, or will be in within the next year.
I have been hearing this for a few years now. Note the article was from 2013. We’re in the fourth quarter of 2014, and I think it’s still debatable if HTML5 is “enterprise ready.”
Seems the real advantage to HTML5 for mobile apps is, that it is faster and easier to develop. Keep in mind that the earlier survey said 59% of developers thought it took longer to develop in HTML. Users also prefer native. In this light the advantages of HTML5 seem very slim to nonexistent.
Why post this? I don’t have an axe to grind, but I do feel there is a lot of hype in HTML5 these days. And it’s easy to see it as a good fit for everything. I feel this approach is not the correct approach. Without applying an honest critique to what is happening in the real world you run the risk of choosing a tool that is not the best fit the job. Which leaves you with a poorly performing product and more hassle than necessary. I believe there is a class of app that works well with HTML5, but it’s a small subset of all of the apps you could make. I also believe that the margin in development effort between native HTML5 much slimmer than what most people would suggest, and possibly nonexistent. If there is an advantage to HTML5, it’s in distribution.
I get this question a lot, here are a few thoughts.
Think about it this way, the alt attribute might tell you what it is if it’s worded well. Bu, even if it is worded well, is it what the page is about? We don’t know. We can’t be sure because the alt is just a description of the the image. The h1 on the other hand is very clearly a very important heading. This is very clear.
Consider a page with these two images:
img alt=”cat”
img alt=”Pepsi”
Is the page about cats or is it about pepsi? You can’t tell. The page might be about Pepsi with a picture of a cat enjoying the pepsi, imagine it’s part of Pepsi’s new ad campaign that takes advantage of the internet’s love of cats.
Or, in an alternate universe, imagine that the page is a cat fancier blog, with a picture their cat named Pepsi. It could happen, Pepsi is a cute name, they already have another cat named Moxi.
Now consider this markup.
h1 Pepsi /h1
img alt cat
The h1 tag clearly says this page is about Pepsi, whether it’s the cat or the drink might have to be determined by meta data. There is no mistaking that Pepsi is more important than cat. Pepsi is a very important heading, while cat is merely an alternate text description of the image.
Using this markup, we’re also clearly describing the content and presentation. Pepsi is the name of the site so we use text. Cat is a picture on the page, presumably a picture of a cat, the computer can’t be sure the picture is actually a Cat, or the logo of a multinational corporation. Consider that in the context of the first example for a moment. Catapillar tractor abbreviates their name as Cat. It’s printed on everything this. I seeing even more room for confusion in the first example.
Using this arrangement we also get the advantage of displaying the logo as text, or as any range of alternate images, based on media queries. The look of the h1 is fully handled by our stylesheet. Mulitnational corporations like to have their logos appear in very specific ways depending on context.
Overly clever readers are thinking, what about this:
img alt=”Cat, the Catapillar company logo”
img alt=”Pepsi our peppy new skid steer loader”
While this is more descriptive it requires a fairly intelligent system to examine the alt text and come up with a meaning. While the Google algorithms are pretty smart, I still feel there’s room for error. And all of the non Google algorithms fail.